


REQUEST A QUOTE OR MORE INFORMATION
Fill out the form below for someone to contact you reguarding quotes and questions.Or visit our contact page for general contact information.
News

Aug. 27, 2026
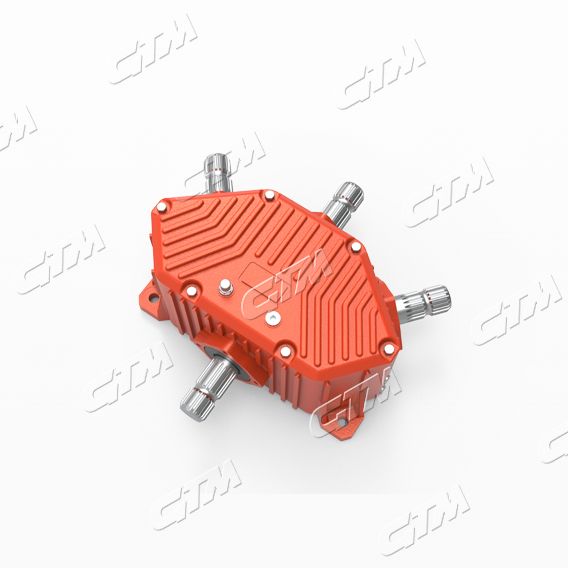
When it comes to maintaining agricultural machinery, efficiently removing and installing a side mount rotary cutter gearbox can make all the difference. At GTM, we understand the intricacies involved in this process, and we're here to provide you with clear, actionable steps that will make this task straightforward and efficient. By following this guide, you will not only save time but also minimize the risk of errors that can lead to costly downtime.
Gather Your Tools
Before starting, make sure you have the following tools on hand:
Safety First
Ensure your machinery is turned off, disconnected from any power source, and cool to the touch. It's critical to wear safety goggles and gloves throughout this procedure to protect yourself from debris and potential injuries.
Remove the Deteriorated Gearbox
a. Detach the Drive Shaft: Locate the drive shaft connected to the side mount rotary cutter gearbox. Remove any securing bolts, carefully sliding it out.
b. Disconnect Wires: If your gearbox has electronic components, thoughtfully disconnect the wiring harness.
c. Unfasten the Gearbox: Use your wrenches to remove the mounting bolts holding the gearbox in place. Be systematic and take note of where each bolt is located for easier reinstallation.
d. Extract the Gearbox: With the mounting bolts removed, gently pull the gearbox away from its housing.
Install the New Side Mount Rotary Cutter Gearbox
a. Position the New Gearbox: Align the new gearbox with the mounting points and ensure it sits flush against the housing.
b. Fasten the Gearbox: Reinsert and tighten the mounting bolts. Using a torque wrench, ensure that you meet the manufacturer’s specifications for bolt tightening, typically adhering to ASTM standards for uniform pressure distribution.
c. Reconnect the Drive Shaft: Slide the drive shaft back into position and secure it.
d. Reattach Wiring: Reconnect any electrical wires to their respective terminals.
Final Checks and Testing
After installation, double-check all connections and fastenings. Start your machinery and monitor the gearbox for unusual sounds or vibrations. This step is crucial to ensure that the gearbox operates smoothly and efficiently.
During this process, you may encounter stiff bolts or rust build-up, which can make removal difficult. Here are some solutions:
To enhance your execution efficiency, consider these tools and resources:
By mastering the removal and installation of a side mount rotary cutter gearbox, you can significantly impact your operational efficiency, cutting downtime and enhancing productivity. I encourage you to act on these steps today.
If you're looking for high-quality replacement gearboxes, GTM is your go-to resource for all agricultural gearbox needs. With precision manufacturing and excellent customer service, GTM is committed to delivering reliable solutions that meet the highest industry standards.
For further guidance, you can refer to this resource for visuals and additional information: GTM Agricultural Gearbox Visuals. Start your journey toward seamless maintenance today!
GEARBOX MANUFACTURER
Zhejiang GTM was established in 1997, which located in economic development zone of Wenling city, southeast of China.
GTM agricultural gearbox products include spiral and straight bevel gearbox, cylinder gear speed reducer, worm reducer, and transmission case etc, which are widely used in various fields as Rotary cutter, grain transportation and storage equipment, Rice harvester,baler,hayrake, rotary tillers, pesticide sprayers, fertilizer spreaders, potato harvester, post-hole diggers, combine harvester,snow-blowers, garden machines and oil exploitation fields etc.
350000+
Annual quantity over
1997
Company establishment
6
Invention patents
56
Utility model patents
REQUEST A QUOTE OR MORE INFORMATION
Fill out the form below for someone to contact you reguarding quotes and questions.Or visit our contact page for general contact information.